How Supplied
Our bulbs will be delivered fresh and healthy. There should be firm, not soft. Some bulbs may arrive with slight mould patches, but this is completely normal and can be brushed off. If you suspect that your bulbs are faulty, do not hesitate to get in touch.
Once your bulbs arrive, take them out of their packaging (including bags) and lay them out on newspaper so they can breathe. This is so they don’t excessively sweat in their containers, ruining the bulbs. Leave somewhere cool and dry until it’s time to plant them.
What We've Included
When to Plant | How to Plant | Where to Plant | After Care |
Common Issues | When will they flower | Inspiration
When to Plant
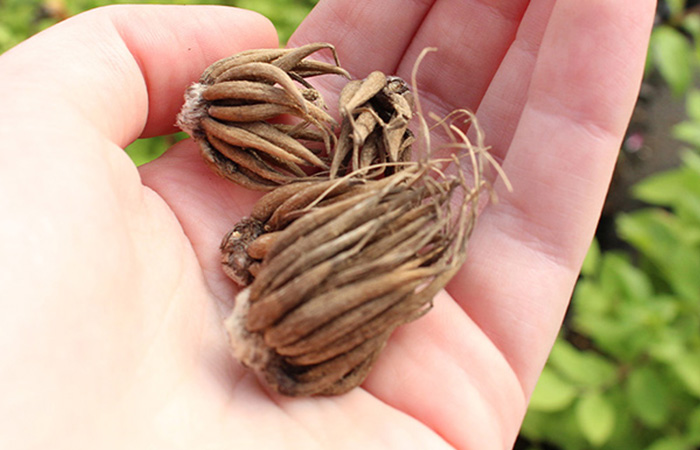
As we mentioned, these corms look more like tiny tubers. Check that they’re in tip top shape before planting! If you suspect that your corms are faulty, do not hesitate to get in touch.
Ranunculi corms can be grown in either spring or autumn, depending on when you’d like to see them bloom. These plants aren’t quite frost hardy, so if you plant your corms in autumn then pop them somewhere frost-free until the end of April.
How to Plant
Before you start, it might be helpful to know that Ranunculus corms, we recommend soaking before planting. It’s not an absolute necessity, as they will soak up the water you give them after, but a good soak can help them grow faster. Simply keep the corms in water for about an hour before planting.
Borders
1. Dig a hole that’s wide enough to fit the corm comfortably, roughly 5cm deep and 10cm apart.
2. You can add bonemeal and horticultural grit (or spent compost) to the bottom of the hole. This will help them to grow healthily. The grit will also allow the soil to drain.
3. Pop each corm into their holes, with the pointy legs facing downwards. Space them twice their width apart.
4. Cover with soil and pat down.
Containers
1. Fill the pot with any multi-purpose compost until you’ve reached its halfway point.
2. As a rule of thumb, plant about 10cm from the top of the pot.
3. Place your corms on top of the soil with their claw legs facing down, spaced about 5cm apart.
4. Cover them with the compost to the top of the pot. Break up any lumps as you go.
5. Gently press the soil so that it’s nice and flat.
6. You can place your pot on feet to allow the moisture from the pot to escape more freely.
Watch Our Video On How to Plant Ranunculus
Watch: How to Plant Ranunculus
Where to Plant
Ranunculi can be grown in beds or containers, but as they can be susceptible to the cold, it’s always a good idea to start them off in pots before popping them outside. If you worry about a lack of sunlight exposure in your garden, flowerpots can be incredibly helpful. Simply move them to wherever the sun is positioned!
After Care
When to water
Water regularly to ensure the soil stays nice and moist. Try not to over water though, as this can damage the roots. To check, pop a pinky finger in the soil – if it’s dry, then they need a good water.
What to do once they have finished blooming
Cut back dead blooms once they’ve wilted. This will help the plant regrow the following year and stops the plant from trying to set seeds. Leave the foliage so that energy can be transferred to the corm.
They can be left to reappear next year with frost protection. Depending on the location, you may prefer to lift and store them before winter sets in. This ensures they’re well protected, stopping them from getting damaged by the rain or the cold.
Storing tips
Lifting ranunculi corms will protect it over the winter. Here’s how and where to store them until the following planting season.
1. Wait until the plant has died down and has reached a straw colour (often brown).
2. Cut down the plant to the bottom of the stem and dig up the tuber gently. Shake off any remaining soil.
3. Keep them in a cool (frost free), dark, dry place, preferably in a dry box or container. If it gets particularly cold, you can cover them with garden fleece or layers of newspaper.
4. From March to April, start the potting on process once again before popping them outside.
Deadheading
Deadhead your ranunculi once they start to wilt. This helps them move their concentration onto growing new buds. When deadheading flowers or using them for indoor bouquets, simply cut the flowers with clean shears, just above the leaves.
Common Issues and How to Solve Them
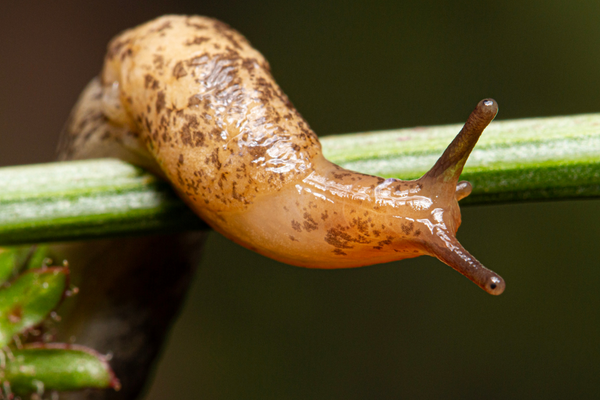
Slugs and snails
They may need some protection from Slugs and Snails. Consider natural protection, like using a ring of gravel or growing in pots. Other slug protection can also be effective.

Powdery Mildew
This white, powdery affliction is often caused due to overly dry conditions. Mix a teaspoon of baking soda in water and spray the affected leaves thoroughly. This won’t bother unaffected leaves.
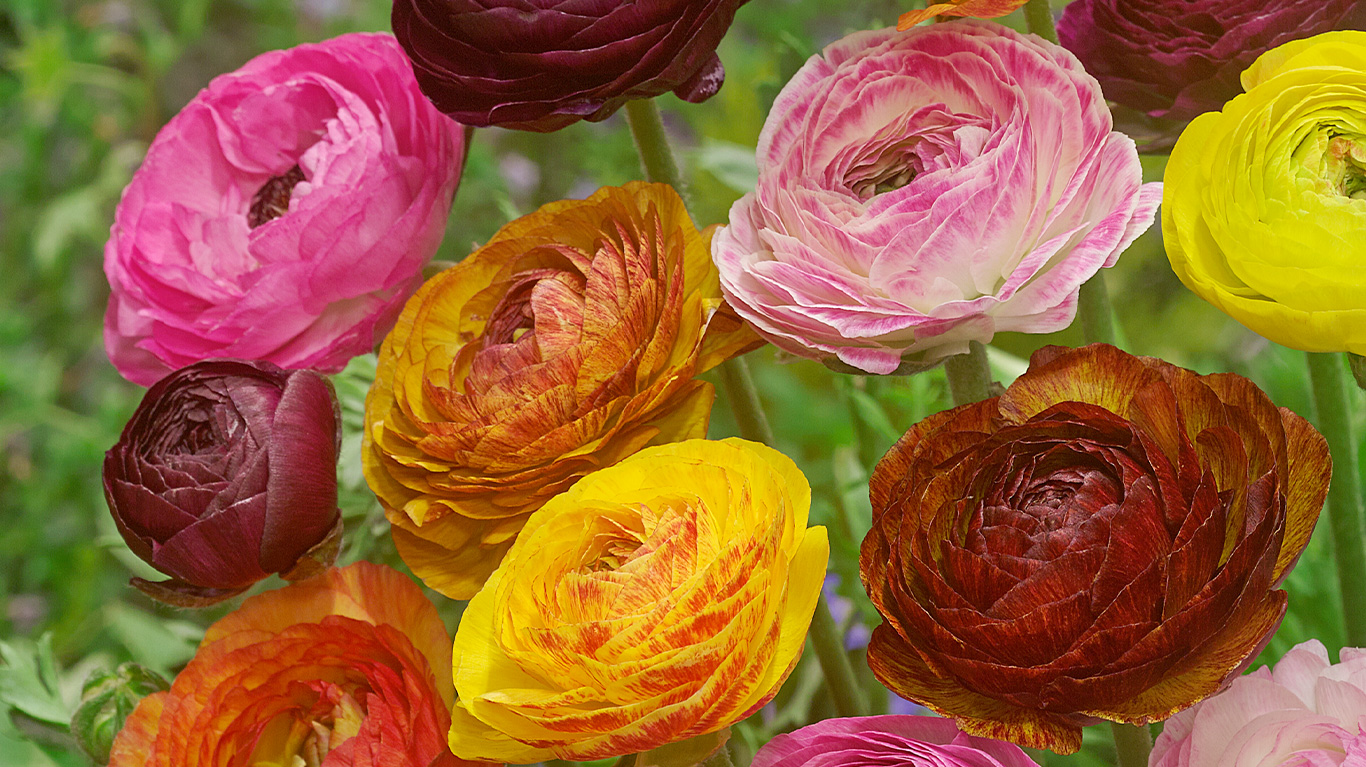
When will they Flower?
Ranunculus flowers appear in spring into early summer and can flower for up to 6 weeks. Their foliage and blooms will make a perfect addition to your garden displays, regardless of the season.
Ready to Shop?
Find some inspiration for your garden