What We've Included
How Supplied | When to Plant | How to Plant | Where to plant | When will they flower |
After Care | Common Issues | Inspiration
How Supplied
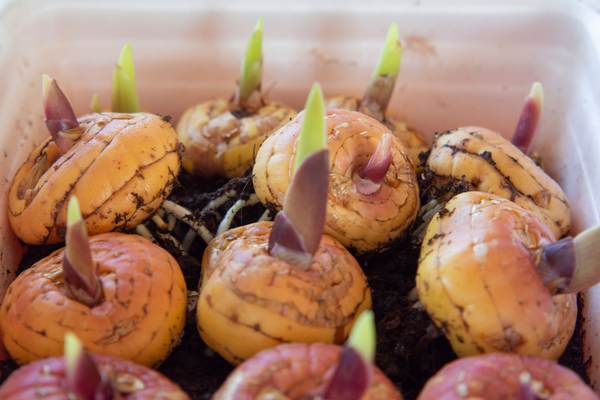
We supply our Gladioli as both corms and bulbs. They’re very similar, especially when it comes to planting. With a bit of help and advice, you will soon become a Gladioli gardening genius.
Our bulbs will be delivered fresh and healthy. There should be firm, not soft. Some bulbs may arrive with slight mould patches, but this is completely normal and can be brushed off. If you suspect that your bulbs are faulty, do not hesitate to get in touch.
Once your bulbs arrive, take them out of their packaging (including bags) and lay them out on newspaper so they can breathe. This is so they don’t excessively sweat in their containers, ruining the bulbs. Leave somewhere cool and dry until it’s time to plant them.
When to Plant
Our Gladioli bulbs and corms will be delivered fresh and healthy.
They should be firm, not soft. Some may arrive with slight mould patches, but this is completely normal and can be brushed off. If you suspect that your bulbs are faulty, do not hesitate to get in touch.
For the best results, plant them in spring, usually from March onwards. Gladiolus corms and bulbs can be grown directly outdoors into borders and containers, ensuring the soil is well-drained and moist.
If you wanted to pot them on before planting them outside, putting them in small pots from late February to April is key.
How to Plant
Borders
1. Dig a hole that’s wide enough to fit the bulb/corm comfortably, and at least 2-3 times their depth. If planting in groups, dig a trench instead of individual holes at the same depth.
2. You can add bonemeal and horticultural grit (or spent compost) to the bottom of the hole. This will help them to grow healthily.
3. Pop each bulb/corm into their holes, pointed side up. Space them twice their width apart.
4. Cover with soil and pat down.
If you’re not too fussy about potting your bulbs and corms on, you can wait until April/May to plant them directly outside. Ensure the soil is covered with mulch to keep them warm before they appear in the summer.
Containers
1. Fill the pot with any multi-purpose compost until you’ve reached its halfway point.
2. As a rule of thumb, bulbs and corms should be planted about 20cm from the top of the pot.
3. Place your bulbs on top of the soil, about 5cm apart.
4. Cover with the compost to the top of the pot. Break up any lumps as you go.
5. Gently press the soil so that it’s nice and flat.
6. You can place your pot on feet to allow the moisture from the pot to escape more freely.
Where to Plant
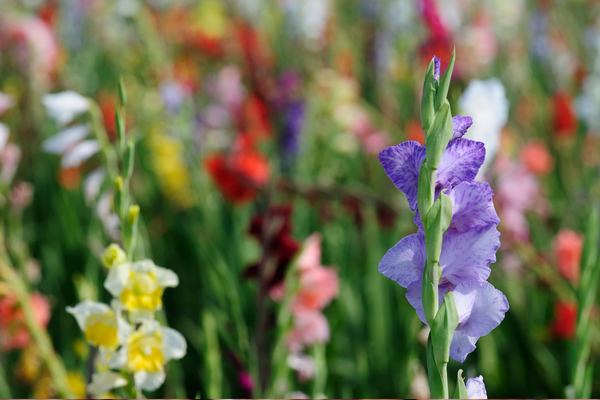
Position your Gladioli plants in areas that reach plenty of sunlight, whether that be in a sunny border or container at the end of the garden or on the patio. As they were natives of the warm weather in the Mediterranean, sunshine is a necessity for them to thrive.
If you worry about a lack of sunlight exposure in your garden, flowerpots can be incredibly helpful. Simply move them to wherever the sun is positioned!
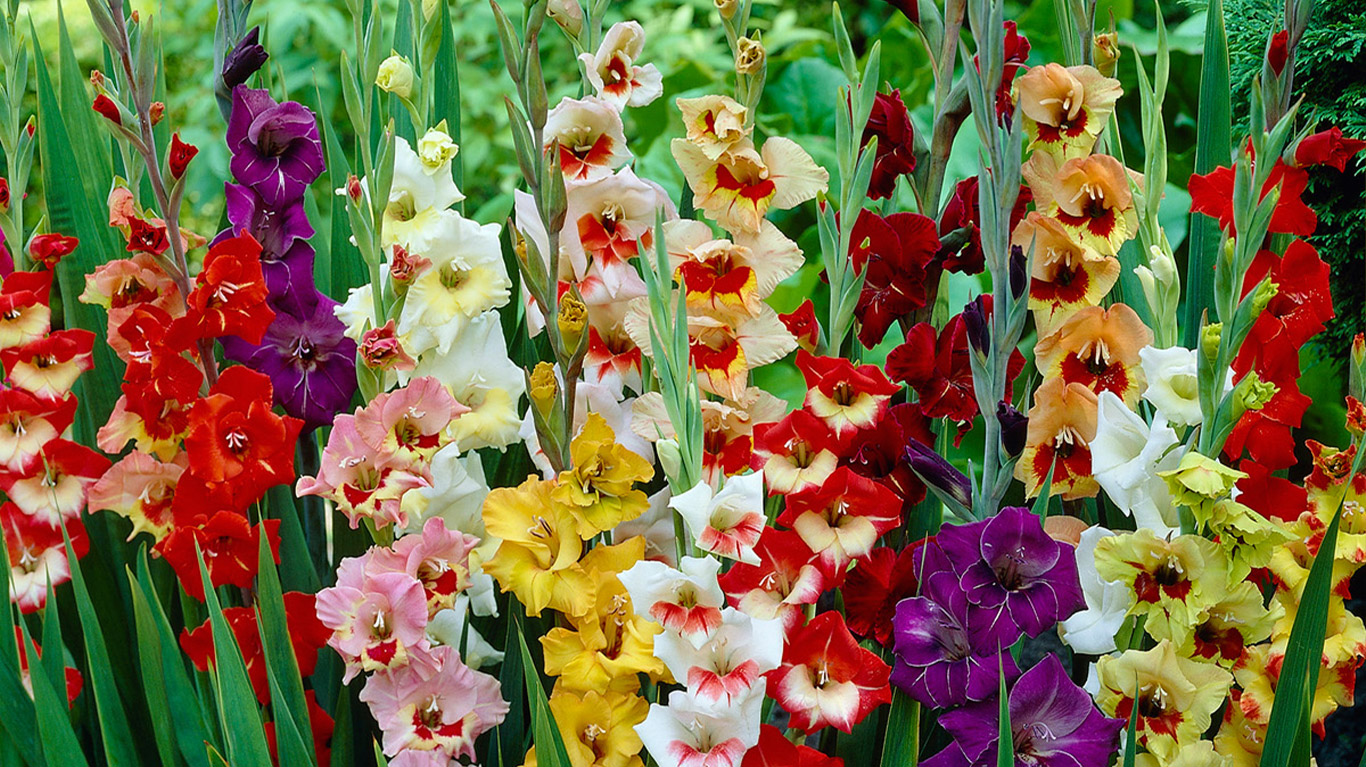
When Will they Flower?
Gladioli have a long flowering period, lasting for months on end. They’re a perfect pick for gardens that need a boost of colour, particularly toward the end of the season.
You will see your gladioli corms appear approximately 100 days after planting. You’ll be able to enjoy them without interruption from June to October, giving you months of glorious colour!
After Care
When to water
Give Gladioli bulbs and corms a good soaking with water weekly, ensuring that it reaches their roots. They should not need much more water than this, and it’s much better to give them a huge glug rather than small sprinklings every other day.
Providing Support
Some varieties of Gladioluses become quite tall and can end up being top-heavy. This might make them droop. Giving them support with a cane like bamboo will help them to stand tall.
What to do once they have finished blooming
Before the first big frost in the late autumn or early winter, some gardeners prefer to dig up Gladioli bulbs and corms. However, you can also get away with leaving them in the ground, ensuring to cover them with a big helping of mulch to keep them warm over the winter.

Storing Tips
Lifting Gladioli corms and bulbs will protect it over the winter. Here’s how and where to store them until the following planting season.
1. Wait until the plant has died down and has reached a straw colour (often brown).
2. Cut down the plant to the bottom of the stem and dig up the tuber gently. Shake off any remaining soil.
3. Keep them in a cool (frost free), dark, dry place, preferably in a dry box or container. If it gets particularly cold, you can cover them with garden fleece or layers of newspaper.
4. From March to April, start the potting on process once again before popping them outside.
Deadheading
Deadheading Gladiolus blooms isn’t as necessary as it is with other summer blooms. However, doing so helps to keep the flower bed looking tidy and uniform whilst the others are still in bloom.
If you prefer to deadhead your flowers or would like to cut them for indoor bouquets, simply cut the spent flower with clean shears, just above the leaves.
Common Issues & How to Solve Them
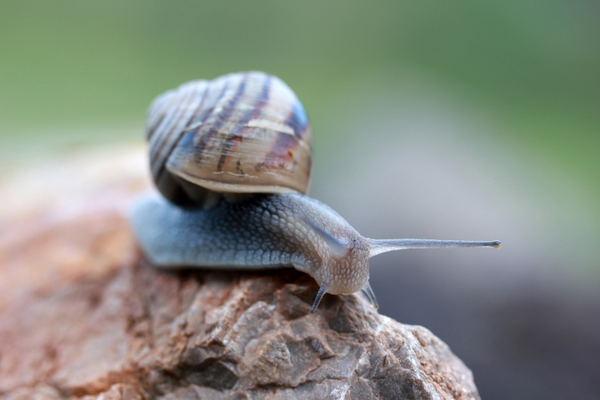
Slugs
Slugs love Gladiolus, especially when they’re in their first stages of flowering. To stop them from reaching them, pop some deterrents on the top of the soil. This includes rough or sharp mulches, eggshells, or sharp grit.
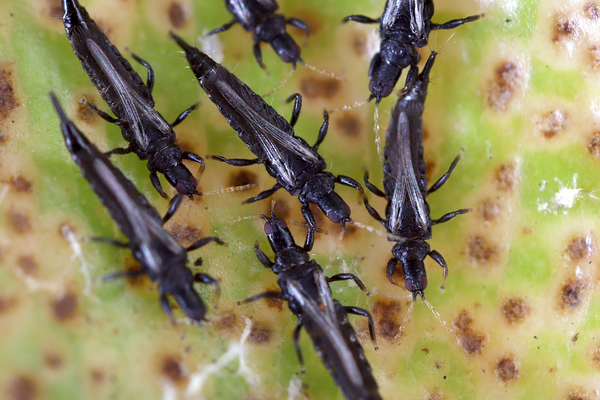
Thrips
Also known as ‘Thunderflies’, thrips are tiny, frustrating insects that can cause damage to a wide range of plants. When thrips are present, you may notice that the foliage on your gladioli has become mottled, dotted with tiny black spots. They particularly thrive in hot, dry conditions. We suggest starting your eradication by misting the plant with water every few days. Cutting off any affected foliage or flower heads can also help.
Ready to Shop?
Find some inspiration for your garden